EasyIEPTM Step-By-Step Help

Initial Phase - Adding Objectives to Annual Goals from Existing Lists

After Annual Goals have been created or selected, short term Objectives should be added to them.  These Objectives will be the specific measures that will be taken by the student to achieve the annual goal. You can add Objectives from an existing list provided by the School System.

To add Objectives from an existing list, follow the steps below.


Most fields will have an asterisk or a question mark beside them.  You may click once on these symbols to access the help for that field.  All fields with an asterisk ( * ) to the right MUST HAVE INFORMATION ENTERED before the data can be entered into the EasyIEP TM database.   All fields with a question mark ( ? ) to the right do not require information to be entered at this time, and, can be edited or updated at any time.


Accessing the Students Area

To add information for a selected student or students, you must access the Students area.  This area will appear after you click once on the Students Button on the Main Menu Bar.  The Main Menu Bar will be at the top of the Main Page after you log-in. The words "Main Menu" will be darkened to distinguish it. p>NOTE: If you have been working in another area of EasyIEP TM(i.e. Schools, School System, Users), and the Main Menu Bar is not at the top of the browser page, click once on the Main Menu Button of the existing menu bar at the top of the browser page.  This will take you to the Main Page.  The Main Menu Bar will be at the top.  Click once on the Students Button to access the Studentsarea.


Adding Objectives to Annual Goals from Existing Lists

If you are already in the Goals & Objectives section of the Students area, go to Step 2.

Step 1 - Accessing the Annual Goals Page

  • You will need to access the Annual Goals Page in the Goals&Objectives section of the Students area.
  • In the Students Menu Bar, click once on Goals & Objectives Button.
  • You will be taken to the Annual Goals Page.
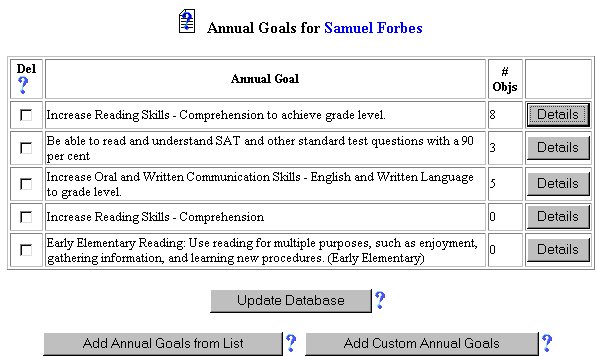
  • A chart will appear with the Annual Goals that have been selected and/or created.
  • Step 2 - Accessing the Objectives Page
  • Look in the chart and find the annual goal where you want to add Objectives.
  • To view, edit, and add short term Objectives (Benchmarks) to an Annual Goal, click on the Details Button for the Annual Goal.
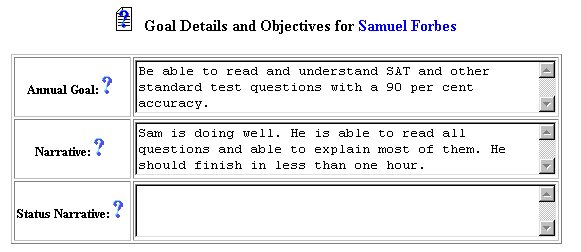
  • This will take you to the Goal Details and Objectives Page.
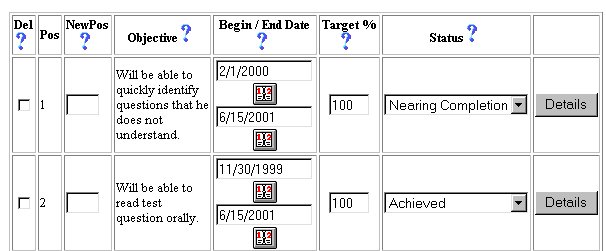
  • Any Objective selected will be displayed in a table along with its Position, Begin/End Date, Target Percent, Status, and a Details Button.
  • If any Objectives are listed: proceed to Step 4.
  • Step 3 - Adding Objectives to an Annual Goal from Lists: Selecting an Instructional Area
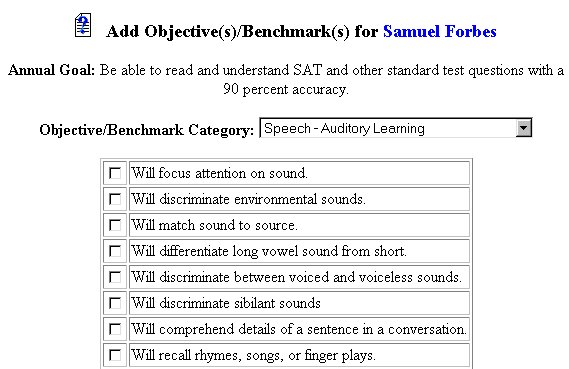
  • Click once on the Add Objective(s) from Lists Button.
  • You will be taken to the Add Objective/Benchmarks Page.
  • The selected annual goal will appear at the top.
  • Select a Objective/Benchmark Category for your Objective by clicking on the arrow to the right in the dropdown box.
  • This will provide you a specific list of Objectives for that category from which you may choose.
  • Click once on the left checkbox of each specific Objective/Benchmark to select it.
  • Step 4 - Entering Objective Data

  • On the Goal Details and Objectives Page, you may enter the Position, Begin/End Date, Target Percent, and Status of the Objective.
  • Click once on the text box in the column titled New Pos,
  • Enter the number of the position of the Objective in the listing.
  • Click once on the Calendar icon and using arrows on top of the calendar, enter the Begin Date in the top text box in the column titled Begin/End Date,
  • You may also type the date in the white text box if you desire.
  • Click once on the Calendar icon and using arrows on top of the calendar, enter the End Date in the top text box in the column titled Begin/End Date,
  • You may also type the date in the white text box if you desire.
  • Click once in the white text field and type-in the Target Percentage for the selected Objective.
  • Type-in the number only; do not use percentage symbol (%). The default percentage is 100.
  • Click once on the arrow on the right of the dropdown box and select the Status of the Objective.
  • Click on the Details Button.
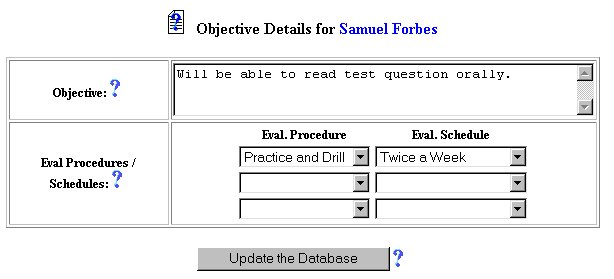
  • You will be taken to the Objective Details Page.
  • Step 5 - Editing Objective and Adding Evaluation Procedures and Schedules

  • Click once on the text box to the right of the Objective title.
  • Edit the Objective as required>
  • Click once on the down arrow in the first dropdown box (Eval. Procedure).
  • Scroll to the desired Evaluation Procedure.
  • Click once on the desired Evaluation Procedure to select.
  • Click once on the down arrow in the second dropdown box (Eval. Schedule).
  • Scroll to the desired Evaluation Schedule for selected Procedure.
  • Click once on the desired Evaluation Schedule to select.
  • NOTE: You may select as many as three Evaluation Procedures/Schedules.

    Step 6 - Updating the Database

    Clicking on the Update the Database Button will save this information in the EasyIEPTM database and take you back to the Goal Details and Objective Page.

  • Click on the Update the Database Button when all Objectives have been selected.
  • You will be returned to the Goal Details and Objectives Page.
  • Any new Objectives will be listed in the table.
  • Repeat the process for all Objectives you wish to complete at this time.
  • When you have finished, click once on the Update the DatabaseButton.
  • You will be taken to the Annual Goal Page where you may begin adding more Objectives to other Annual Goals.
  • Step 7 - Deleting an Objective from an Annual Goal

    To delete an Objective from an annual goal, click once in the checkbox in the Delete column next to the Objective you want to delete.

    Click once on the Update the Database Button to enter the information. The Objective will be removed from the Objectives Page.


    The Adding Objectives from Lists part of the initial phase is now complete for the selected student.  If you wish to continue the Objectives for the selected student by adding customized Objectives for your annual goals, select Adding Objectives to Annual Goals from the Help Menu and continue.

    If you wish to continue the initial phase for the selected student, click once on the Supplemental Aids Button in theStudents Menu Bar at the top of the page.

    If you prefer to go to another area to enter IEP data, click on that Button in the Students Menu Bar at the top of the page.

    If you prefer to access another part of the database (i.e. Schools,Users, etc.), click once on the Main Menu Button of the Students Menu Bar to access the Main Page and the Main Menu Bar.