EasyIEPTM
Step-By-Step Help
Initial Phase - Adding Special Education Service Information
The Special Education and Related Services area allows the user to add
classes, extra-curricular activities and special education services (tutoring,
therapy, etc.) for the selected student. To add any of these items,
follow the steps below.
Most fields will have an asterisk or a question mark
beside them. You may click once on these symbols to access the help for
that field. All fields with an asterisk ( * ) to the right MUST HAVE
INFORMATION ENTERED before the data can be entered into the EasyIEP
TM database. All fields with a question mark ( ? ) to
the right do not require information to be entered at this time, and, can be
edited or updated at any time.
Accessing the Students Area
To add information for a selected student or students, you must access
the Students area. This area will appear after you click once
on the Students Button on the Main Menu Bar. The Main
Menu Bar will be at the top of the Main Page after you log-in. The
words "Main Menu" will be darkened to distinguish it.
NOTE: If you have been working in another area of EasyIEP
TM(i.e. Schools, School System, Users), and the Main Menu Bar
is not at the top of the browser page, click once on the Main Menu
Button of the existing menu bar at the top of the browser page. This
will take you to the Main Page. The Main Menu Bar will be at the top.
Click once on the Students Button to access the Studentsarea.
Adding Special Education Service Information
Step 1 - Criteria for Selecting a Student
Clicking on the Students Button will take you to theCriteria
for Selecting Students Page.
Select Criteria to provide a listing of students
You will be taken to the Select a Student Page. Click on a student
name (link) and you will be taken to the Students Personal Information Page.
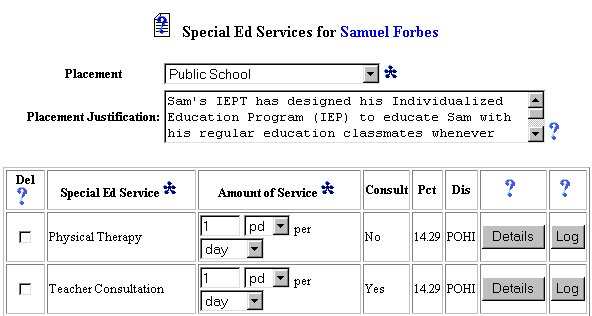
Step 2 - Accessing the Special Education Services Page
Go to the Students Menu Bar.
Click once on the Special Ed Services Button.
You will be taken to the Special Ed Services Page.
Step 3 - Adding Special Education Instructional Services and/or Related
Services
Click once on the Add Special Ed Service Button.
You will be taken to the Add Special Education Services Page.
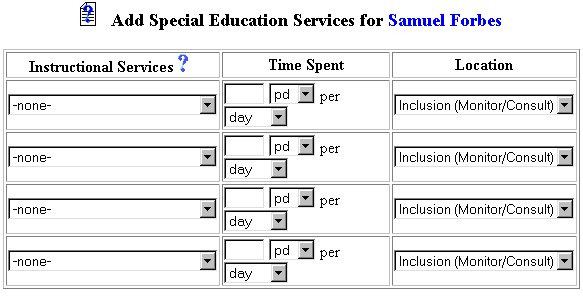
 To add an Instructional Service (class) from a list, click once
on the arrow on the right of the dropdown box.
Scroll (if necessary) to the class or activity you wish to add.
Click once on the selected class or activity.
Repeat the procedure to add additional information in the remaining dropdown
lists (if needed).
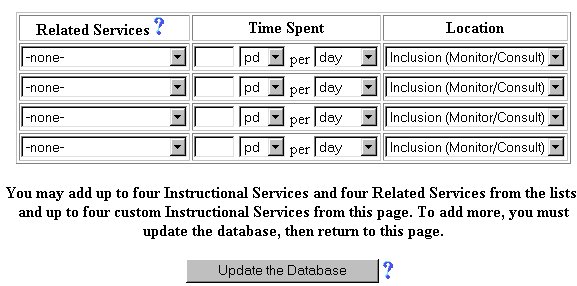
If you wish to add a customized class, activity, or service, go to Step
4.
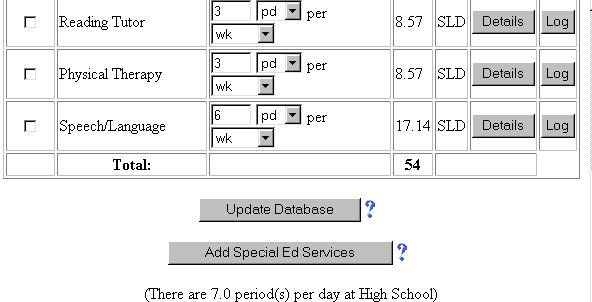
If you are finished adding classes, activities, and/or services, click
once on the Update the Database Button.
You will be returned to the Special Ed. Services Page. Your
information has been added to the chart.
To add an Instructional Service (class) from a list, click once
on the arrow on the right of the dropdown box.
Scroll (if necessary) to the class or activity you wish to add.
Click once on the selected class or activity.
Repeat the procedure to add additional information in the remaining dropdown
lists (if needed).
If you wish to add a customized class, activity, or service, go to Step
4.
If you are finished adding classes, activities, and/or services, click
once on the Update the Database Button.
You will be returned to the Special Ed. Services Page. Your
information has been added to the chart.
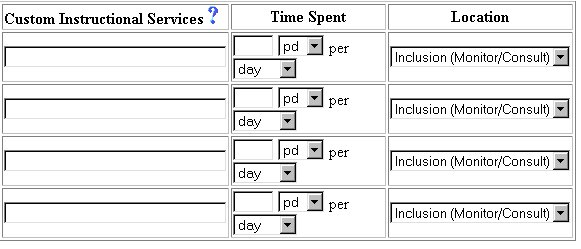
Step 4 - Adding Custom Instructional Services and/or Related Services
Click once in the white text field and type-in the Custom Instructional
Service and/or Related Service you want to add.
Repeat the procedure for the remaining text fields (if needed).
If you are finished adding custom classes, activities, and/or services,
click once on the Update the Database Button.
You will be returned to the Special Ed. Services Page. Your information
has been added to the chart.
Step 5 - Completing Special Ed Services Information
To add the Time Spent for an entry, click on the arrow to the right of
the dropdown box for the left text field.
Select the unit for time measurement (i.e.., period (pd), minute, (min),
hour (hr), or block (blk).
Click on the correct selection.
Click on the arrow to the right of the right text field.
Select the period of measurement (i.e., day, week (wk), month (mon),reporting
period (rep pd), school year (sch yr), year (yr).
Click on the correct selection.
To select the Location for an entry, click on the arrow to the
right of the dropdown box in the location column.
Scroll (if required) to the desired location
Click on the correct selection.
Repeat the process for all entries.
When finished, click once on the Update the Database Button at
the bottom of the page.
The Adding Special Education Services Information part of the initial phase
is now complete for the selected student. If you wish to continue
the initial phase for the selected student, click once on the Transition
Plan Button in the Students Menu Bar.
If you prefer to go to another area to enter IEP data, click on thatButton
in the Students Menu Bar.
If you prefer to access another part of the database (i.e. Schools,Users,
etc.), click once on the Main Menu Button of the StudentsMenu Bar
to access the Main Page and the Main Menu Bar.