EasyIEPTM
Step-By-Step Help
Edit Phase - Editing Transition Service Information
Transition Services are those assisting services, agencies and specialty
groups that should be enlisted to help guarantee the successful transition
of the Special Education student into a post-secondary life. They may
be selected from an existing list or customized to fit specific needs.
To edit Transition Services for the selected student, follow the steps below.
Most fields will have an asterisk or a question mark
beside them. You may click once on these symbols to access the help
for that field. All fields with an asterisk ( * ) to the right MUST
HAVE INFORMATION ENTERED before the data can be entered into the EasyIEP
TM database. All fields with a question mark ( ? ) to
the right do not require information to be entered at this time, and, can
be edited or updated at any time.
Accessing the Students Menu
To add information for a selected student or students, you must access
the Students Menu. This Menu will appear after you click once
on the Students Button on the Main Menu Bar. The Main
Menu Bar will be at the top of the Main Page after you log-in. The
words "Main Menu" will be darkened to distinguish it.
NOTE: If you have been working in another area of EasyIEP
TM(i.e. Schools, School System, Users), and the Main Menu Bar
is not at the top of the browser page, click once on the Main Menu
Button of the existing menu bar at the top of the browser page. This
will take you to the Main Page. The Main Menu Bar will be at
the top. Click once on the Students Button to access the Students
area.
Editing Transition Service Information
Step 1 - Criteria for Selecting a Student
Clicking on the Students Button will take you to theCriteria
for Selecting Students Page.
Select Criteria to provide a listing of students
You will be taken to the Select a Student Page. Click on a student
name (link) and you will be taken to the Students Personal Information Page.
Step 2 - Accessing the Transition Service Page
Go to the Students Menu Bar.
Click once on the Transition Services Button.
You will be taken to the Transition Service Page.
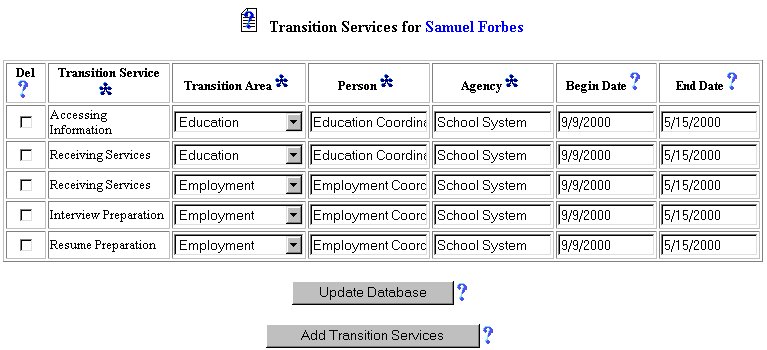
Step 3 - Editing a Transition Service
If no services have been added for the selected student, a message will
alert the user.
Services that have been entered for the selected student will be seen
in the Transition Services column of the chart. These are not
editable.
NOTE: This is a required field and must have data entered for this or any
other data fields on this page to be input into the database.
To edit the Transition Area information, click once on the arrow
on the right of the dropdown box. Select a new Menu.
NOTE: This is a required field and must have data entered for this or any
other data fields on this page to be input into the database.
To edit the Person information, click once in the white text field,
delete the contents and add the new Person information.
NOTE: This is a required field and must have data entered for this or any
other data fields on this page to be input into the database.
To edit the Agency information, click once in the white text field,
delete the contents and add the new Agency information.
NOTE: This is a required field and must have data entered for this or any
other data fields on this page to be input into the database.
To edit the Begin Date information, click once in the white text
field, delete the contents and add the new Begin Date information.
To edit the End Date information, click once in the white text
field, delete the contents and add the new End Date information.
Repeat the process for all services you wish to edit.
Additional services may be added by clicking on the Add Transition Services
Button.
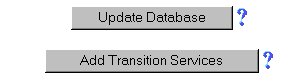
Step 4 - Updating the Database
When finished, click once on the Update Database Button.
You will see the updated database message

IMPORTANT: No information (data) will be entered into the database
unless the Update the Database Button has been clicked after you have
entered your data on the page.
The Editing Transition Services Information part of the edit phase is now
complete for the selected student.
If you prefer to go to another Menu to enter IEP data, click on that Button
in the Students Menu Bar.
If you prefer to access another part of the database (i.e. Schools, Users,
etc.), click once on the Main Menu Button of the Students Menu Bar
to access the Main Page and the Main Menu Bar.