Managing EasyIEPTM Database Dropdown Lists
The EasyIEPTM database has many dropdown lists (contained in dropdown boxes) throughout the program. Although the current lists were developed and imported by PCG, Inc. and your School System, additions and corrections are needed periodically.
You may perform one of two major functions:
Note: You must have permission to perform these administrative tasks.
Permissions are assigned by the School System Administration according to
user types. If your user type does not have this permission, contact
your System Administrator for an explanation.
To Edit or View the program dropdown lists, follow the steps below.
Most fields will have an asterisk or a question mark beside them. You may click once on these symbols to access the help for that field. All fields with an asterisk ( * ) to the right MUST HAVE INFORMATION ENTERED before the data can be entered into the EasyIEP TM database. All fields with a question mark ( ? ) to the right do not require information to be entered at this time, and, can be Edited or updated at any time.
Accessing the Correct Administrative Area
To manage dropdown lists, you must access the School System area. This area will appear after you click once on the School SystemButton on the Main Menu Bar. The Main Menu Bar will be at the top of the Main Page after you log-in. The words "Main Menu" will be darkened to distinguish it. Click once on the School System Button of the Main Menu Bar.
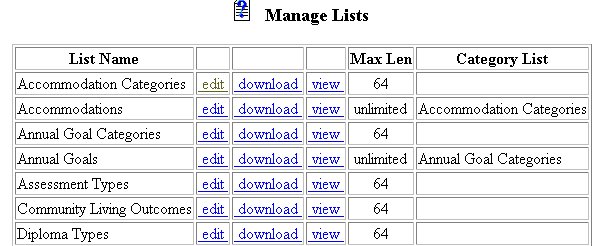
The School System Menu Bar will appear. Click once on the Lists button. This will take you to the Manage Lists Page.
NOTE: If you have been working in the Students area of EasyIEP TM and the Main Menu Bar is not at the top of the browser page, click once on the Main Menu button of the existing menu bar at the top of the browser page. This will take you to the Main Page. The Main Menu Bar will be at the top.
Managing Lists
Step 1 - Selecting the List to Edit or View
Note: Viewing and Editing permissions are assigned by theSchool
System administration. Some users will have Viewing access. Some
will have Editing access. Some will have both.
Step 2 - Editing a Specific Dropdown List
After clicking on the Edit link, you will be taken to the Editing
List Page. You will find a chart that will have each item in the
dropdown list in a separate area. Each item will have the following:
At the bottom of the chart will be a text field for entering new dropdown
list items.
Step 3 - Changing the Position of an Item on a Dropdown List
At times, you may want a specific item(s) to appear at the front or top
of a dropdown list to eliminate confusion or to allow the most-chosen items
to appear first. To accomplish a change in the order of list items:
Step 4 - Showing Items on the Dropdown List
If you would like to remove an item from appearing on the list, but
NOTfrom the list permanently:
Step 5 - Entering New List Items
If a new item needs to be added to the existing list:
Step 6 - Clicking the Update Database Button
None of the information you have entered will go into the database unless you click once on the Update Database Button. After entering all necessary information, click once on the Update Database Button to enter and save the information.
If you prefer to go to another area to enter data, You must first get back to the Main Menu Bar.
To return to the Main Menu Bar, click once on the Main Menu button of the School System Menu Bar.
The Main Menu Bar will appear at the top of the page.
If you wish to continue to perform administrative tasks in the School System area, click once on one of the buttons on the School System Menu Bar.