Administering Inactive Students
To go directly to a specific section, click once on the title link below:
Viewing Inactive Students
Entering Exit Information
Re-Activating an Inactive Student
Permanently Deleting an Inactive Student
After students have been made inactive by a Teacher or Administrator,
the information about these students can be viewed and/or acted upon by the
Administrator. Inactive students may be:
All of these functions are accomplished in the Inactive Students Section of School System Menu.
To view, re-activate, or permanently delete an inactive student, follow the steps below.
NOTE: You must have permission to perform administrative tasks. Permissions are assigned by the School System administration according to user types. If your user type does not have this permission, contact your System Administrator for an explanation.
Most fields will have an asterisk or a question mark beside them. You may click once on these symbols to access the help for that field. All fields with an asterisk ( * ) to the right MUST HAVE INFORMATION ENTERED before the data can be entered into the Easy IEPTM database. All fields with a question mark ( ? ) to the right do not require information to be entered at this time, and, can be edited or updated at any time.
Accessing the School System Administrative Area To perform administrative tasks, you must access the School System area. This area will appear after you click once on the School System Button on the Main Menu Bar. The Main Menu Bar will be at the top \ of the Main Page after you log-in. The words "Main Menu" will be darkened to distinguish it.
Once you click on the School System Button, the Edit School System Information Page will appear with the School System Menu Bar at the top.
NOTE: If you have been working in the Students area of EasyIEP TM and the Main Menu Bar is not at the top of the browser page, click once on the Main Menu Button of the existing menu bar at the top of the browser page. This will take you to the Main Page. The Main Menu Bar will be at the top.
Administering Inactive Students
Step 1 - Managing Inactive Students
Once on the Manage Inactive Students Page, you will see a chart listing
all of the inactive students by:
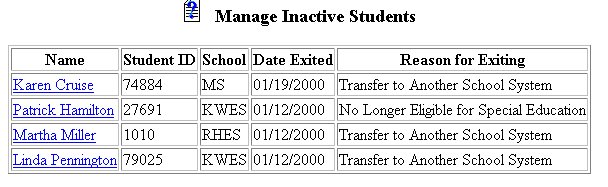
You can print out the chart by using your browser's print function.
Step 2 - Entering Exit Information for Inactive Students
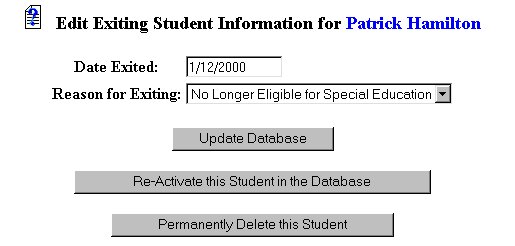
To enter exiting information for an inactive student, click once on the student's Name in the Name column of the chart of inactive students. You will be taken to the Edit Exiting Student Information Page.
Step 3 - Re-Activating an Inactive Student
To re-activate an inactive student, click once on the student's Name in the Name column of the chart of inactive students. You will be taken to the Edit Exiting Student Information Page.
To re-activated the inactive student, click once on the Re-Activate this Student in the Database Button. The student will be made active and will be removed from the Inactive Student Chart.
Step 4 - Permanently Deleting an Inactive Student
To permanently delete an inactive student, click once on the student's Name link in the Name column of the chart of inactive students. You will be taken to the Edit Exiting Student Information Page.
To permanently delete the inactive student, click once on the Permanently Delete this Student Button. A warning will be given. you may then select to delete or to change your mind about deleting the inactive student.
If you choose to delete, the student will be removed from the database.
Student IEP information and history will remain in the database for future reference.
If you prefer to go to another area to enter data, You must first get back to the Main Menu Bar.
To return to the Main Menu Bar, click once on the Main Menu Button of the School System Menu Bar. The Main Menu Bar will appear at the top of the page.
If you wish to continue to perform administrative tasks in the School System area, click once on one of the buttons on the School System Menu Bar.